Kitchen Backsplash Height Guide: Surrey & White Rock
How high should a kitchen backsplash go? Standard heights, full-height tile, behind the range, around windows and where to stop, for Surrey and White Rock.
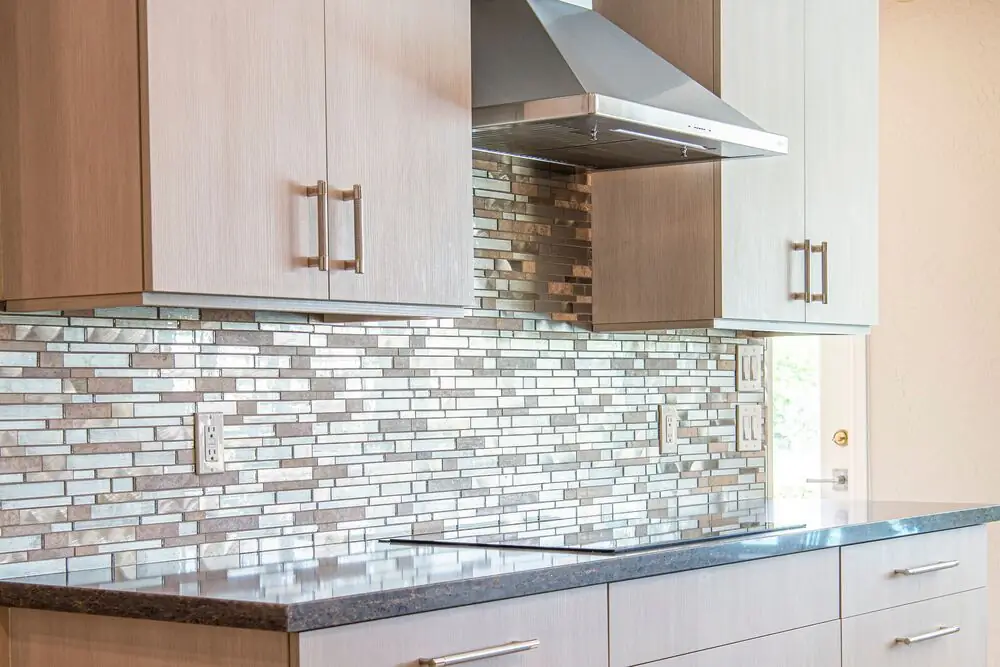
How High Should a Kitchen Backsplash Go? A Guide for Surrey and White Rock
⏱ Estimated Reading Time: 5–6 minutes
Quick answer: In most kitchens, the backsplash runs from the countertop to the underside of the upper cabinets, which is usually about 18 inches. On walls without upper cabinets, such as behind a range with a hood or under open shelving, it often looks best taken to the ceiling or to the bottom of the hood. At the sides, the tile usually stops in line with the edge of the upper cabinets or the end of the counter.
At a glance:
- Under upper cabinets: counter to cabinets, usually about 18 inches
- Behind the range: at least to the hood, often to the ceiling
- Open shelving or no uppers: to the ceiling, or a clean line well above the counter
- Around windows: up to the sill or wrapping the window opening
- Side edges: in line with the upper cabinets or the end of the counter
Choosing backsplash tile is the fun part. Deciding exactly where it starts and stops is where many kitchen renovations go wrong. A backsplash that ends at an awkward height, stops short on one side, or leaves a sliver of painted wall beside the hood can make an expensive tile look unfinished. Here’s how to decide how high your backsplash should go and where it should end, for kitchens in Surrey and White Rock.
The Standard Height Under Upper Cabinets
Standard kitchen counters are about 36 inches high, and upper cabinets usually start about 18 inches above the counter. That 18-inch space is the standard backsplash zone, and in most kitchens the tile fills it completely, from the top of the counter to the underside of the upper cabinets. Filling the full height protects the wall from splashes and grease and looks much more finished than a short strip. Our guide to standard kitchen cabinet measurements covers counter and cabinet heights in detail.
The Old 4-Inch Backsplash
Many older kitchens have a short 4-inch backsplash made from the same laminate or stone as the counter, with painted wall above. It was common in builder-grade kitchens for decades, but it now looks dated, and it leaves the wall above unprotected. In a renovation, most homeowners replace it with tile or slab that runs the full height to the upper cabinets.
Behind the Range
The wall behind the range takes the most heat, grease, and splatter, so it needs the most coverage. If there’s a range hood, the backsplash should run at least up to the bottom of the hood, and many designers take it all the way to the ceiling behind the hood for a clean, dramatic look. Stopping the tile at the cabinet line beside a chimney hood can leave an odd patch of painted wall, which is why full height behind the range is so common. Our guide to ducted vs ductless range hoods covers how the hood fits into the design.
Walls Without Upper Cabinets
Many modern kitchens leave out upper cabinets on one wall in favour of open shelving or a clean, open look. On these walls, there’s no natural stopping point, so the backsplash either goes all the way to the ceiling or stops at a deliberate line well above the counter, often aligned with the top of a window or the underside of the shelving. Full-height tile on a shelving wall creates a striking feature and is easy to clean.
Around Windows
When a window sits over the sink, the backsplash usually runs up to the window sill on either side. Some designs wrap the tile into the window opening itself, covering the sill and returns, which is practical beside a sink since that area gets wet. Plan the tile layout so the cuts around the window are even and centred.
Where the Backsplash Should Stop at the Sides
The side edges are where unfinished-looking backsplashes usually go wrong. The cleanest approach is to stop the tile in line with the outside edge of the upper cabinets, so the backsplash forms a neat rectangle. If the counter extends past the upper cabinets, the tile usually follows the counter to its end. Where the backsplash meets a wall corner, running it into the corner gives a natural stopping point. Exposed edges should be finished with a matching bullnose piece or a metal edge trim for a clean line.
Slab Backsplashes
A slab backsplash, often made from the same quartz or stone as the counter, gives a seamless look with no grout lines. It can run the standard 18-inch height or go full height behind the range. Slab backsplashes are easy to clean and suit modern kitchens, though they cost more than most tile. The same height and edge rules apply.
Plan the Outlets and Lighting
Outlets in the backsplash affect how it looks. Planning their placement before tiling lets them be lined up neatly or moved under the upper cabinets with plug-mold strips, leaving the backsplash clean. Under-cabinet lighting also shows off the tile and lights the counter. Our guide to under-cabinet lighting covers the options. For tile styles and materials, our guide to the best kitchen backsplash shares ideas.
Final Thoughts
In most kitchens, the backsplash runs about 18 inches from the counter to the upper cabinets. Behind the range it goes at least to the hood and often to the ceiling, and on walls without uppers it either goes to the ceiling or ends at a deliberate line. Stop the sides in line with the cabinets or the end of the counter, finish every exposed edge, and plan outlets and lighting before the tile goes up. Get these details right, and your Surrey or White Rock kitchen backsplash will look finished and intentional.


